Headertab

Drop Down MenusCSS Drop Down MenuPure CSS Dropdown Menu

Monday, 6 March 2017

Android app shortcut

Hello friends,

There comes  new features and Android Nougat 7.1 is no different. One of these new features is App Shortcuts. App Shortcuts allow the user to access primary actions in your app straight from the launcher, taking the user deep into your application, by long pressing on your app icon.
Main point of shortcut use..
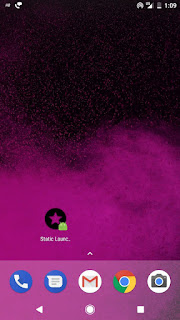

  1. App Shortcuts are great for exposing actions of your app and bring back users into your flow
  2. They can be static or dynamic
  3. Static are set in stone once you define them (you can only update them with an app redeploy)
  4. Dynamic can be changed on the fly
  5. You can create a back stack of activities once you open one through a shortcut
  6. Shortcuts can be reordered, but only in their respective type and static shortcuts will come always at the bottom as they're added first (there's no rank property to be defined on them)
  7. The labels of the shortcuts are CharSequence so you can manipulate them through spans.
Android app shortcut basically two type-

1. Static shortcut
2. Dynamic shortcut

How to add static shortcut: 

First you create a new project or existing project go to android manifest.xml and add below line


<?xml version="1.0" encoding="utf-8"?>
<manifest xmlns:android="http://schemas.android.com/apk/res/android"
    package="samset.appshortcut">

    <application
        android:allowBackup="true"
        android:icon="@mipmap/ic_launcher"
        android:label="@string/app_name"
        android:supportsRtl="true"
        android:theme="@style/AppTheme">
        <activity android:name=".MainActivity">
            <intent-filter>
                <action android:name="android.intent.action.MAIN" />

                <category android:name="android.intent.category.LAUNCHER" />
                <category android:name="android.intent.category.DEFAULT" />
            </intent-filter>

            <meta-data
                android:name="android.app.shortcuts"
                android:resource="@xml/shortcut" />
        </activity>
     
    </application>

</manifest>

Now you create in a xml folder in res folder and create file shortcut.

shortcut.xml

<?xml version="1.0" encoding="utf-8"?>
<shortcuts xmlns:android="http://schemas.android.com/apk/res/android">
    <shortcut
        android:enabled="true"
        android:icon="@drawable/ic_stars"
        android:shortcutDisabledMessage="@string/disabled_message"
        android:shortcutId="id_static"
        android:shortcutLongLabel="@string/static_label"
        android:shortcutShortLabel="@string/launcher_label">
        <!-- You see here i define two intent i think you confuse why i use two intent so i confirm first intent use when your app launch and you press back then you come on MainActivity-->
        <intent
            android:action="android.intent.action.Main"
            android:targetClass="samset.appshortcut.MainActivity"
            android:targetPackage="samset.appshortcut" />
        <!-- Second intent use when you long press and open shortcut then you redirect your target actvity(StaticActivity)-->
        <intent
            android:action="android.intent.action.VIEW"
            android:targetClass="samset.appshortcut.StaticShortcutActivity"
            android:targetPackage="samset.appshortcut" />
    </shortcut>

    <shortcut
        android:enabled="true"
        android:icon="@drawable/ic_settings"
        android:shortcutDisabledMessage="@string/disabled_message"
        android:shortcutId="id_setting"
        android:shortcutLongLabel="@string/setting_label"
        android:shortcutShortLabel="@string/launcher_label_settings">
        <intent
            android:action="android.intent.action.Main"
            android:targetClass="samset.appshortcut.MainActivity"
            android:targetPackage="samset.appshortcut" />
       <intent
            android:action="android.intent.action.VIEW"
            android:targetClass="samset.appshortcut.StaticShortcutActivity"
            android:targetPackage="samset.appshortcut" />
    </shortcut>
</shortcuts>

  • enabled: as the name states, whether the shortcut is enabled or not. If you decide to disable your static shortcut you could either set this to false, or simply remove it from the <shortcuts> set
  • icon: the icon shown on the left hand side of the shortcut. In my case, I created a simple Vector Drawable from within Android Studio and assigned it as an icon
  • shortcutDisabledMessage: when you disable your shortcut, it will disappear from the ones that the user can reveal by long pressing your application icon, but one can pin a shortcut to the launcher (by long pressing and dragging it on the desired launcher page), so when disabled the pinned shortcut will appear greyed out and upon tapping it a Toast with this message will appear
  • shortcutLongLabel: longer text of the shortcut shown when the launcher has enough space
  • shortcutShortLabel: a concise description of the shortcut. The field is mandatory. Most probably this will be the one which will appear on your launcher
  • intent: here you define your intent (or more intents) that your shortcut will open upon being tapped


How to add dynamic shortcut: 

MainActivity.java

package samset.appshortcut;

import android.annotation.SuppressLint;
import android.annotation.TargetApi;
import android.content.Intent;
import android.content.pm.ShortcutInfo;
import android.content.pm.ShortcutManager;
import android.graphics.drawable.Icon;
import android.net.Uri;
import android.os.Build;
import android.os.Bundle;
import android.support.v7.app.AppCompatActivity;

import java.util.Arrays;

public class MainActivity extends AppCompatActivity {
    private ShortcutManager shortcutManager;

    @SuppressLint("NewApi")
    @Override
    protected void onCreate(Bundle savedInstanceState) {
        super.onCreate(savedInstanceState);
        setContentView(R.layout.activity_main);
        shortcutManager = getSystemService(ShortcutManager.class);
        if (Build.VERSION.SDK_INT >= 25) {
            createShorcut();
        }
    }


    @TargetApi(25)
    private void createShorcut() {

        ShortcutInfo webshart = new ShortcutInfo.Builder(this, "shortcutweb")
                .setShortLabel("web")
                .setLongLabel("Website")
                .setIcon(Icon.createWithResource(this, R.drawable.ic_touch_app))
                .setIntent(new Intent(Intent.ACTION_VIEW, Uri.parse("http://samsetdev.blogspot.in/")))
                .setRank(0)
                .build();

        ShortcutInfo dynamicShortcut = new ShortcutInfo.Builder(this, "dynamicshortcut")
                .setShortLabel("Dynamic")
                .setLongLabel("Dynamic Activity")
                .setIcon(Icon.createWithResource(this, R.drawable.ic_touch_app))
                .setIntents(new Intent[]{new Intent(Intent.ACTION_MAIN, Uri.EMPTY, this, MainActivity.class).setFlags(Intent.FLAG_ACTIVITY_CLEAR_TASK),
                        new Intent(DynamicActivity.ACTION)
                })
                .setRank(1)
                .build();

        shortcutManager.setDynamicShortcuts(Arrays.asList(webshart, dynamicShortcut));
    }

    @TargetApi(25)
    private void removeShorcuts() {
        ShortcutManager shortcutManager = getSystemService(ShortcutManager.class);
        shortcutManager.disableShortcuts(Arrays.asList("shortcut1"));
        shortcutManager.removeAllDynamicShortcuts();
    }
}


add some line of code in manifest file:

<?xml version="1.0" encoding="utf-8"?>
<manifest xmlns:android="http://schemas.android.com/apk/res/android"
    package="samset.appshortcut">

    <application
        android:allowBackup="true"
        android:icon="@mipmap/ic_launcher"
        android:label="@string/app_name"
        android:supportsRtl="true"
        android:theme="@style/AppTheme">
        <activity android:name=".MainActivity">
            <intent-filter>
                <action android:name="android.intent.action.MAIN" />

                <category android:name="android.intent.category.LAUNCHER" />
                <category android:name="android.intent.category.DEFAULT" />
            </intent-filter>

            <meta-data
                android:name="android.app.shortcuts"
                android:resource="@xml/shortcut" />
        </activity>
        <activity
            android:name=".StaticShortcutActivity"
            android:label="@string/static_label" />

        <activity
            android:name=".DynamicActivity"
            android:label="@string/dynamic_label">
            <intent-filter>
                <action android:name="samset.appshortcut.DYNAMIC_SHORTCUT" />
                <category android:name="android.intent.category.DEFAULT" />
            </intent-filter>
        </activity>
    </application>

</manifest>


Thank you
FullSourcecode


Friday, 3 March 2017

Change icon color in android

Hello friends,

I am going to teach you today, how to change colour of image programmatically. So if you want to use a image(icon) with multiple colours then you don't have to take multiple images, now you can change colour by code.


Method 1:

activity_main

<?xml version="1.0" encoding="utf-8"?>
<LinearLayout xmlns:android="http://schemas.android.com/apk/res/android"
    android:layout_width="match_parent"
    android:layout_height="match_parent"
    android:background="#e6eae8"
    android:orientation="vertical">

    <ImageView
        android:layout_weight="1"
        android:id="@+id/imgView2"
        android:layout_width="match_parent"
        android:layout_height="0dp"
        android:src="@drawable/dummy_prodcut"
        />
    <ImageView
        android:layout_weight="1"
        android:id="@+id/imgView1"
        android:layout_width="match_parent"
        android:layout_height="0dp"
        android:src="@mipmap/ic_launcher"
        />

</LinearLayout>

MainActivity.java

public class MainActivity extends AppCompatActivity {

    private ImageView imgIcon1,imgIcon2;
 
    @SuppressLint("NewApi")
    @Override
    protected void onCreate(Bundle savedInstanceState) {
        super.onCreate(savedInstanceState);
        setContentView(R.layout.activity_main);
        imgIcon1 = (ImageView) findViewById(R.id.imgView1);
        imgIcon2 = (ImageView) findViewById(R.id.imgView2);

        imgIcon1.setColorFilter(getResources().getColor(R.color.darkPurple,null));
        imgIcon2.setColorFilter(getResources().getColor(R.color.colorPrimaryDark,null));

}
}


Method 2:

MainActivity.java

public class MainActivity extends AppCompatActivity {

    private ImageView imgIcon1,imgIcon2;
 
    @SuppressLint("NewApi")
    @Override
    protected void onCreate(Bundle savedInstanceState) {
        super.onCreate(savedInstanceState);
        setContentView(R.layout.activity_main);
        imgIcon1 = (ImageView) findViewById(R.id.imgView1);
        imgIcon2 = (ImageView) findViewById(R.id.imgView2);

     String strColorCode = "#969600";
        if (strColorCode != null && strColorCode.length() > 0 && strColorCode.length()==7) {
            mColorCode = Color.parseColor(strColorCode);

            //Get the image to be changed from the drawable, drawable-xhdpi, drawable-hdpi,etc folder.
             Drawable sourceDrawable = getResources().getDrawable(R.drawable.ic_big_cart,null);

            //Convert drawable in to bitmap
            Bitmap sourceBitmap = convertDrawableToBitmap(sourceDrawable);
            //Pass the bitmap and color code to change the icon color dynamically.
            mFinalBitmap = changeColor(sourceBitmap, mColorCode);
            imgIcon1.setImageBitmap(mFinalBitmap);

        }else {

            Toast.makeText(MainActivity.this, "Please enter valid color code",Toast.LENGTH_SHORT).show();
        }

}
}

public static Bitmap changeColor(Bitmap bitmap, int color) {
        Bitmap resultBitmap = Bitmap.createBitmap(bitmap, 0, 0, bitmap.getWidth() - 1, bitmap.getHeight() - 1);
        Paint p = new Paint();
        ColorFilter filter = new LightingColorFilter(color, 1);
        p.setColorFilter(filter);

        Canvas canvas = new Canvas(resultBitmap);
        canvas.drawBitmap(resultBitmap, 0, 0, p);
        return resultBitmap;
    }


    public static Drawable covertBitmapToDrawable(Context context, Bitmap bitmap) {
        Drawable d = new BitmapDrawable(context.getResources(), bitmap);
        return d;
    }

        Bitmap bitmap = Bitmap.createBitmap(drawable.getIntrinsicWidth(), drawable.getIntrinsicHeight(), Bitmap.Config.ARGB_8888);
        Canvas canvas = new Canvas(bitmap);
        drawable.setBounds(0, 0, canvas.getWidth(), canvas.getHeight());
        drawable.draw(canvas);

        return bitmap;
    }


Thank you

Live Sample


Thursday, 2 March 2017

Check array number ordering or sort

Hello friends,


  public static void main(String[] args) {

 int arr[]={1,2,3,4,5};
  int arr[]={1,3,5,2,7,33,55,33,22,11,55,100,9};


         boolean sorted = true;

        for (int i = 0; i < arr.length - 1; i++) {
            if (arr[i] > arr[i+1]) {
                sorted = false;
                break;
            }else {
                sorted=true;
            }
        }
     
    }

Thank you

How to generate a random number that do not repeat

Hello friends,

Random number generate without duplicate.

In Android

MainActvity.java

package com.samset.user.sample;


public class MainActivity extends AppCompatActivity {
   
    @Override
    protected void onCreate(Bundle savedInstanceState) {
        super.onCreate(savedInstanceState);
        setContentView(R.layout.activity_main);
     
        findViewById(R.id.btn).setOnClickListener(new View.OnClickListener() {
            @Override
            public void onClick(View view) {
                generateRandom();
            }
        });
    }


    public static void generateRandom() {
        Random rand = new Random();
        Set<Integer> set = new HashSet<Integer>();

        while(set.size() < 5) {
            set.add(rand.nextInt(9)+2);
        }

        String numStr = "";
        for(Integer n : set) {
            numStr += n;
        }
        int num = Integer.parseInt(numStr);
        System.out.print(" Random Number is  "+num);
        Log.e("TAG"," Random Number is  "+num);

    }  

}

In Java

public class Test {

    public static void main(String[] args) {

        for(int i = 0; i < 8; i++) {
            generateRandom();
        }
     
    }


Output:

1: Random Number is  87953
2: Random Number is  810953
3: Random Number is  810932
4: Random Number is  107953
5: Random Number is  410523


Thank you


BottomNavigationView in android

Hello friends,

Today we learn about how to make bottom tab navigation system.Most of developer use viewpager but this is not right way because viewpager is very complex handling switching tab and maintaining tab status so if you want to learn and developed bottom navigation tab then use BottomNavigationView.

Follow below instructions...

Create new project.

build.gradle

apply plugin: 'com.android.application'

android {
    compileSdkVersion 25
    buildToolsVersion "25.0.2"
    defaultConfig {
        applicationId "com.samset.bottomnavigationviewsample"
        minSdkVersion 15
        targetSdkVersion 25
        versionCode 1
        versionName "1.0"
        testInstrumentationRunner "android.support.test.runner.AndroidJUnitRunner"
    }
    buildTypes {
        release {
            minifyEnabled false
            proguardFiles getDefaultProguardFile('proguard-android.txt'), 'proguard-rules.pro'
        }
    }
}

dependencies {
    compile fileTree(include: ['*.jar'], dir: 'libs')
    androidTestCompile('com.android.support.test.espresso:espresso-core:2.2.2', {
        exclude group: 'com.android.support', module: 'support-annotations'
    })
    compile 'com.android.support:appcompat-v7:25.2.0'
    compile 'com.android.support:design:25.2.0'
    compile 'com.android.support:support-v4:25.2.0'
    testCompile 'junit:junit:4.12'
}

MainActivity.java


import android.support.annotation.NonNull;
import android.support.design.widget.BottomNavigationView;
import android.support.v4.app.Fragment;
import android.support.v4.app.FragmentTransaction;
import android.support.v7.app.AppCompatActivity;
import android.os.Bundle;
import android.view.MenuItem;
import android.widget.TextView;

import com.samset.bottomnavigationviewsample.frament.HomeFragment;
import com.samset.bottomnavigationviewsample.frament.NotificationFragment;
import com.samset.bottomnavigationviewsample.frament.SearchFragment;

public class MainActivity extends AppCompatActivity {
    private static final String SELECTED_ITEM = "selected_item";
    private BottomNavigationView navigationView;
    private TextView tvTitle;
    private int selected;

    @Override
    protected void onCreate(Bundle savedState) {
        super.onCreate(savedState);
        setContentView(R.layout.activity_main);
        navigationView = (BottomNavigationView) findViewById(R.id.navigation);
        tvTitle = (TextView) findViewById(R.id.tvTitle);
        MenuItem selectedItem;
        if (savedState != null) {
            selected = savedState.getInt(SELECTED_ITEM, 0);
            selectedItem = navigationView.getMenu().findItem(selected);
        } else {
            selectedItem = navigationView.getMenu().getItem(0);
        }
        selectFragment(selectedItem);


        navigationView.setOnNavigationItemSelectedListener(new BottomNavigationView.OnNavigationItemSelectedListener() {
            @Override
            public boolean onNavigationItemSelected(@NonNull MenuItem item) {
                selectFragment(item);
                return true;
            }
        });

    }

    @Override
    protected void onSaveInstanceState(Bundle outState) {
        outState.putInt(SELECTED_ITEM, selected);
        super.onSaveInstanceState(outState);
    }

    private void selectFragment(MenuItem item) {
        switch (item.getItemId()) {
            case R.id.menu_home:
                beginTransaction(new HomeFragment());
                break;
            case R.id.menu_notifications:
                beginTransaction(new SearchFragment());
                break;
            case R.id.menu_search:
                beginTransaction(new NotificationFragment());
                break;
        }

        // update selected item
        selected = item.getItemId();

        // uncheck the other items.
        for (int i = 0; i< navigationView.getMenu().size(); i++)
        {
            MenuItem menuItem = navigationView.getMenu().getItem(i);
            menuItem.setChecked(menuItem.getItemId() == item.getItemId());
        }

        tvTitle.setText(item.getTitle());


    }

    private void beginTransaction(Fragment fragment)
    {
        if (fragment != null) {
            FragmentTransaction ft = getSupportFragmentManager().beginTransaction();
            ft.add(R.id.mainContainer, fragment, fragment.getTag());
            ft.commit();
        }
    }

    @Override
    public void onBackPressed() {
        MenuItem homeItem = navigationView.getMenu().getItem(0);
        if (selected != homeItem.getItemId()) {
            selectFragment(homeItem);
        } else {
            super.onBackPressed();
        }
    }


}


activity_main.xml

<?xml version="1.0" encoding="utf-8"?>
<LinearLayout xmlns:android="http://schemas.android.com/apk/res/android"
    xmlns:app="http://schemas.android.com/apk/res-auto"
    xmlns:tools="http://schemas.android.com/tools"
    android:layout_width="match_parent"
    android:layout_height="match_parent"
    android:orientation="vertical">

    <android.support.v7.widget.Toolbar
        android:layout_width="match_parent"
        android:layout_height="0dp"
        android:layout_weight="0.1"
        android:background="@color/colorPrimaryDark">

        <TextView
            android:id="@+id/tvTitle"
            android:layout_width="wrap_content"
            android:layout_height="wrap_content"
            android:text="Title"
            android:textAppearance="?android:attr/textAppearanceMedium"
            android:textColor="#fff" />
    </android.support.v7.widget.Toolbar>

    <FrameLayout
        android:background="#f1f1f1"
        android:id="@+id/mainContainer"
        android:layout_width="match_parent"
        android:layout_height="0dp"
        android:layout_weight="0.8" />

    <android.support.design.widget.BottomNavigationView
        android:background="@drawable/nav_shape"
        android:id="@+id/navigation"
        android:layout_width="match_parent"
        android:layout_height="0dp"
        android:layout_gravity="start"
        android:layout_weight="0.1"
        app:menu="@menu/bottom_nav_items" />


</LinearLayout>

HomeFragment.java

package com.samset.bottomnavigationviewsample.frament;


import android.os.Bundle;
import android.support.v4.app.Fragment;
import android.view.LayoutInflater;
import android.view.View;
import android.view.ViewGroup;

import com.samset.bottomnavigationviewsample.R;

/**
 * A simple {@link Fragment} subclass.
 */
public class HomeFragment extends Fragment {


    public HomeFragment() {
        // Required empty public constructor
    }


    @Override
    public View onCreateView(LayoutInflater inflater, ViewGroup container,
                             Bundle savedInstanceState) {
        // Inflate the layout for this fragment
        return inflater.inflate(R.layout.fragment_home, container, false);
    }

}

fragement_home.xml

<RelativeLayout xmlns:android="http://schemas.android.com/apk/res/android"
    xmlns:tools="http://schemas.android.com/tools"
    android:layout_width="match_parent"
    android:layout_height="match_parent"
    android:background="#fffeee">

    <TextView
        android:textSize="30dp"
        android:layout_centerInParent="true"
        android:layout_width="wrap_content"
        android:layout_height="wrap_content"
        android:text="Home" />

</RelativeLayout>


Thank you!

SourceCode

LiveSample


Wednesday, 1 March 2017

Timer count in android

Hello friends,


new CountDownTimer(3000, 200) {

    @Override
    public void onTick(long millisUntilFinished) {
    }

    @SuppressLint("NewApi")
    @Override
    public void onFinish() {
       frame_outer.setTest("Number:"+i);
        i++;
        if (i == colors.length - 1) i = 0;
        start();
    }
}.start();


Thank you

Programmatically create gradient in android

Hello friends,
If you want create gradient but not using xml then follow below instructions and code.

MainActivity.java


private LinearLayout ll_mainLayout;
@Override
protected void onCreate(Bundle savedInstanceState) {
    super.onCreate(savedInstanceState);
    setContentView(R.layout.activity_main);

   ll_mainLayout=(LinearLayout)findViewById(R.id. ll_main);
  ll_mainLayout.setBackgroundResource(R.drawable. getgradiantInit);


}


public GradientDrawable getgradiantInit() {
    int[] colors = {Color.parseColor("#F28542"), Color.parseColor("#F74368")};
    GradientDrawable gd = new GradientDrawable(GradientDrawable.Orientation.TOP_BOTTOM, colors);
    gd.setCornerRadius(20f);
    return gd;
}

private GradientDrawable getgradiantFirst() {//3AA2E2
   
int[] colors1 = {Color.parseColor("#46AF62"), Color.parseColor("#3AA2E2")};//3AA2E2
   
GradientDrawable gd1 = new GradientDrawable(GradientDrawable.Orientation.TOP_BOTTOM, colors1);
    gd1.setCornerRadius(20f);

    return gd1;
}

private GradientDrawable getgradiantSecond() {
    int[] colors1 = {Color.parseColor("#EFB410"), Color.parseColor("#D14654")};
    GradientDrawable gd1 = new GradientDrawable(GradientDrawable.Orientation.TOP_BOTTOM, colors1);
    gd1.setCornerRadius(20f);

    return gd1;
}

private GradientDrawable getgradiantThird() {
    int[] colors1 = {Color.parseColor("#90CC57"), Color.parseColor("#46AF62")};
    GradientDrawable gd1 = new GradientDrawable(GradientDrawable.Orientation.TOP_BOTTOM, colors1);
    gd1.setCornerRadius(10f);

    return gd1;
}

main_activity.xml

<LinearLayout
    android:id="@+id/ll_main"
    android:layout_width="300dp"
    android:layout_height="400dp"
    android:orientation="vertical">

<TextView
    android:layout_below="@+id/txtUserGameDate"
    android:id="@+id/txtUserGameTime"
    android:layout_width="match_parent"
    android:layout_height="wrap_content"
    android:text="SAMSET
    android:textColor="@color/white"
    android:textSize="8sp"
    android:textStyle="bold"
    />


</LinearLayout>


Thank you